Looking for the CS100 GEN 1 User's Manual? Find it Here.
CS100 GEN 2 User's Manual
Please follow these instructions carefully for best results.
Warning: Always unplug the CS100 when not in use. Do not use unattended.
Unboxing
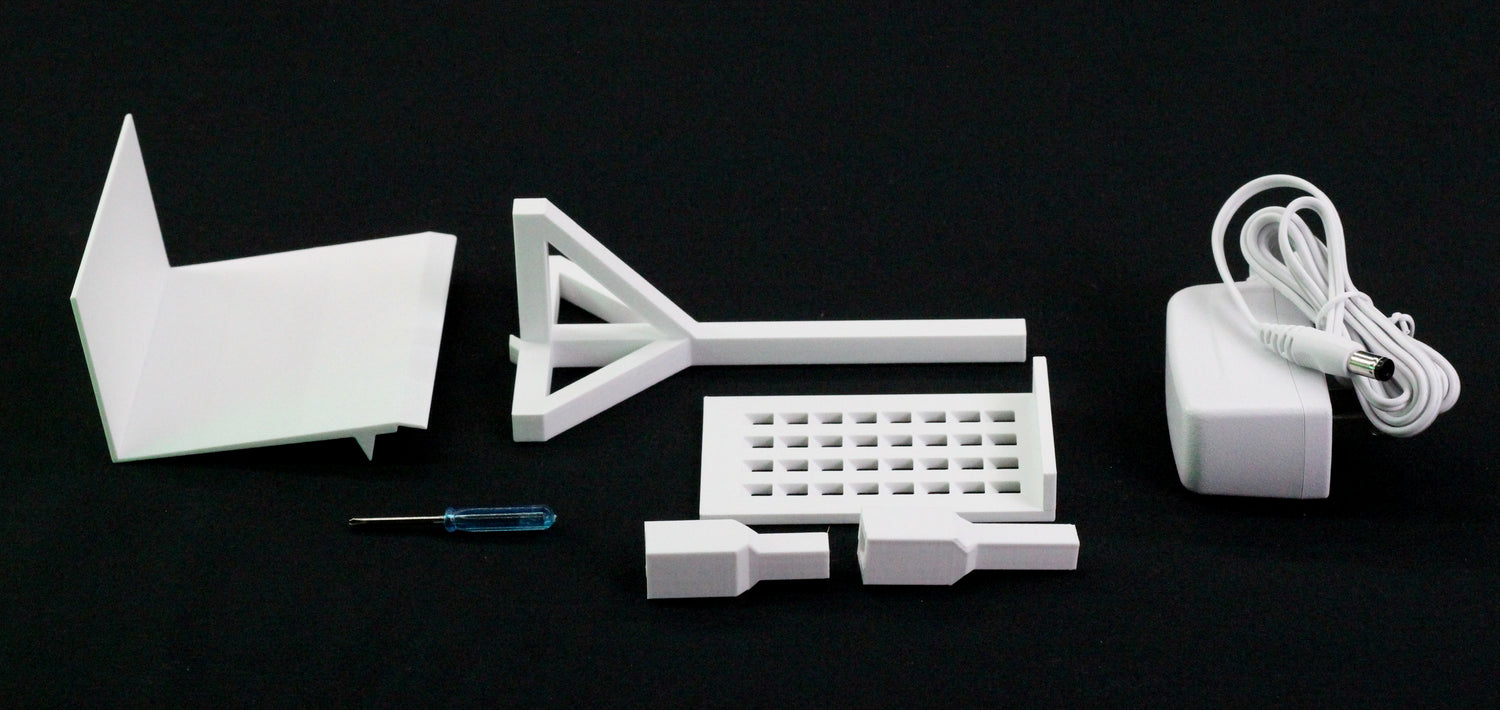
Accessory Kit
Your CS100 will come with the main unit and an accessory box. In the accessory box you should have the following items, pictured left to right:
- Exit Bin
- Mini Screwdriver
- Phone Stand
- Small Extender
- Phone Holder Grid
- Large Extender
- Power Supply
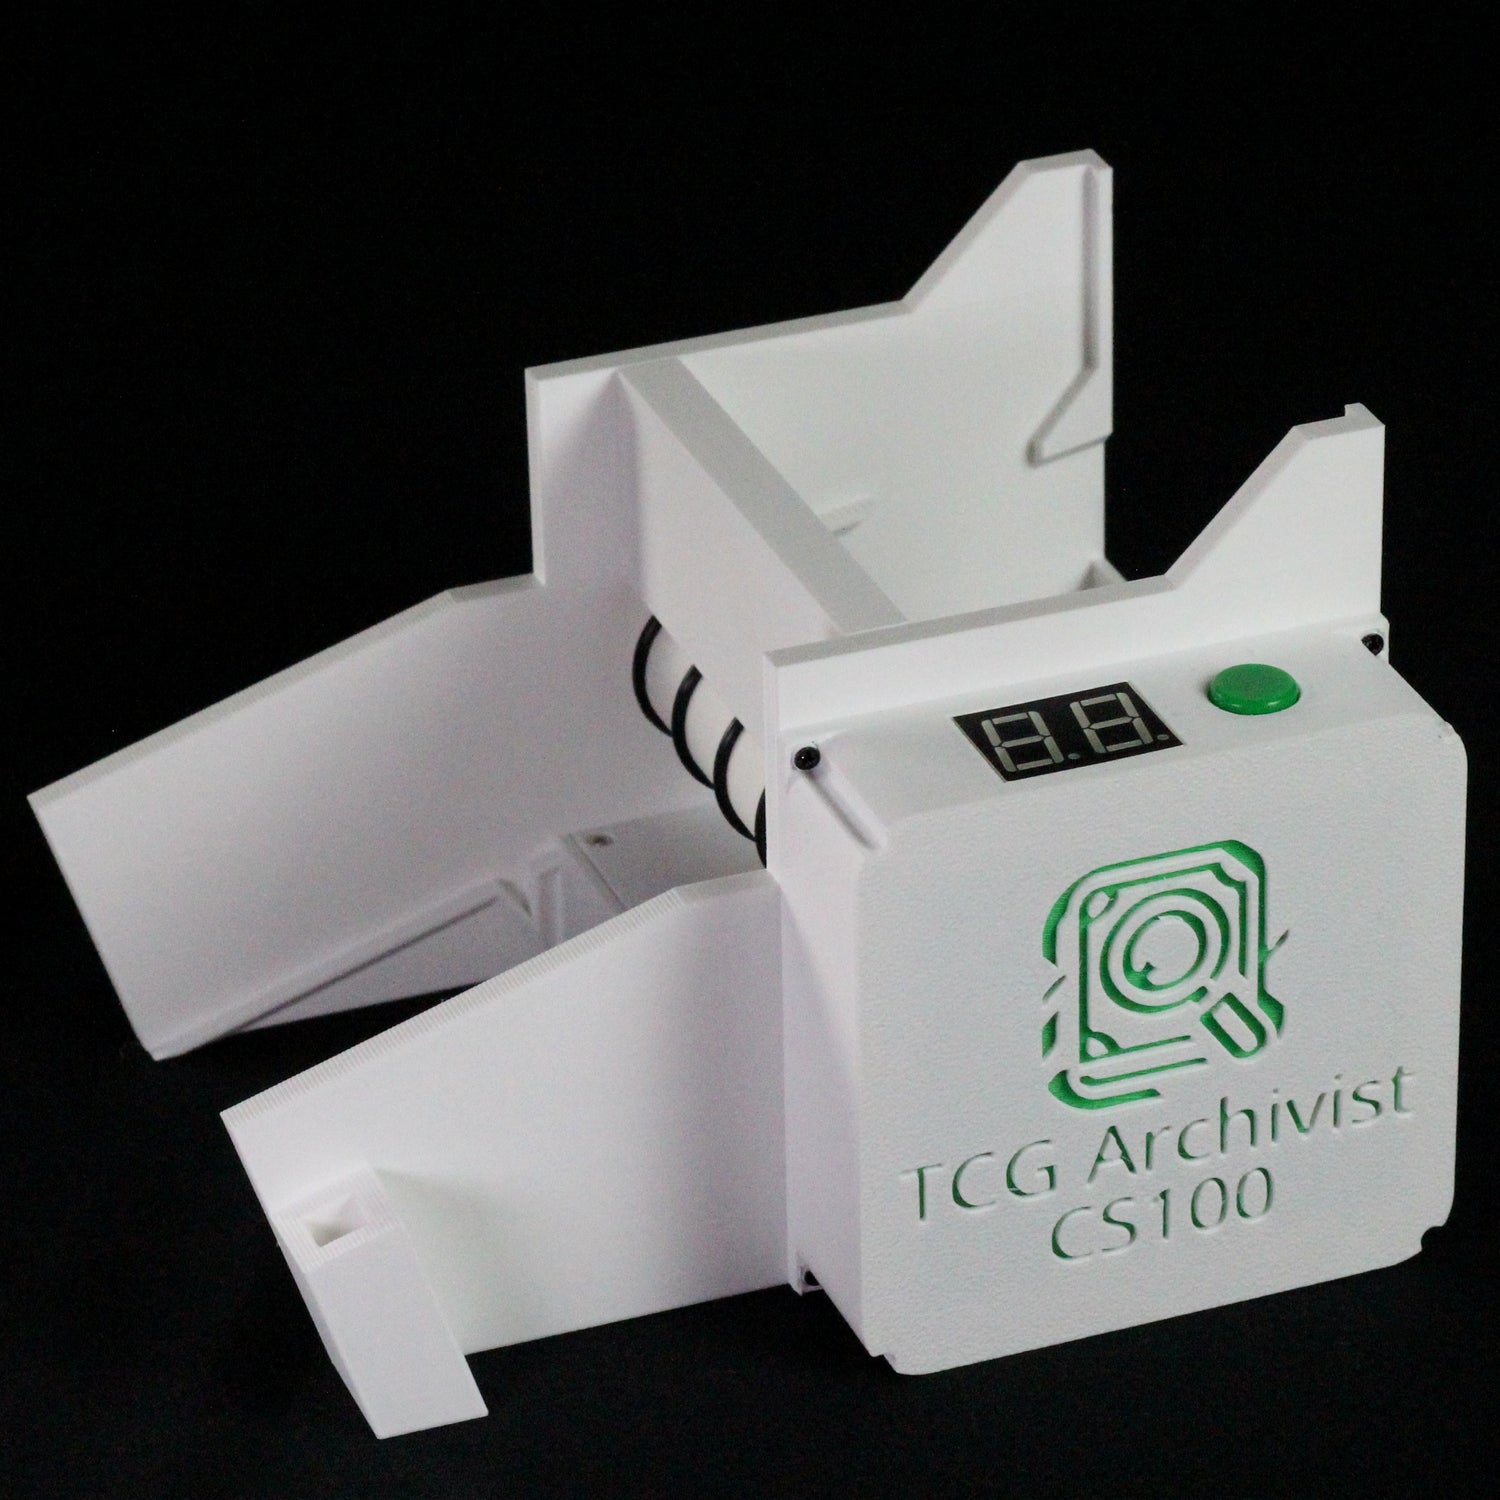
CS100 Main Unit
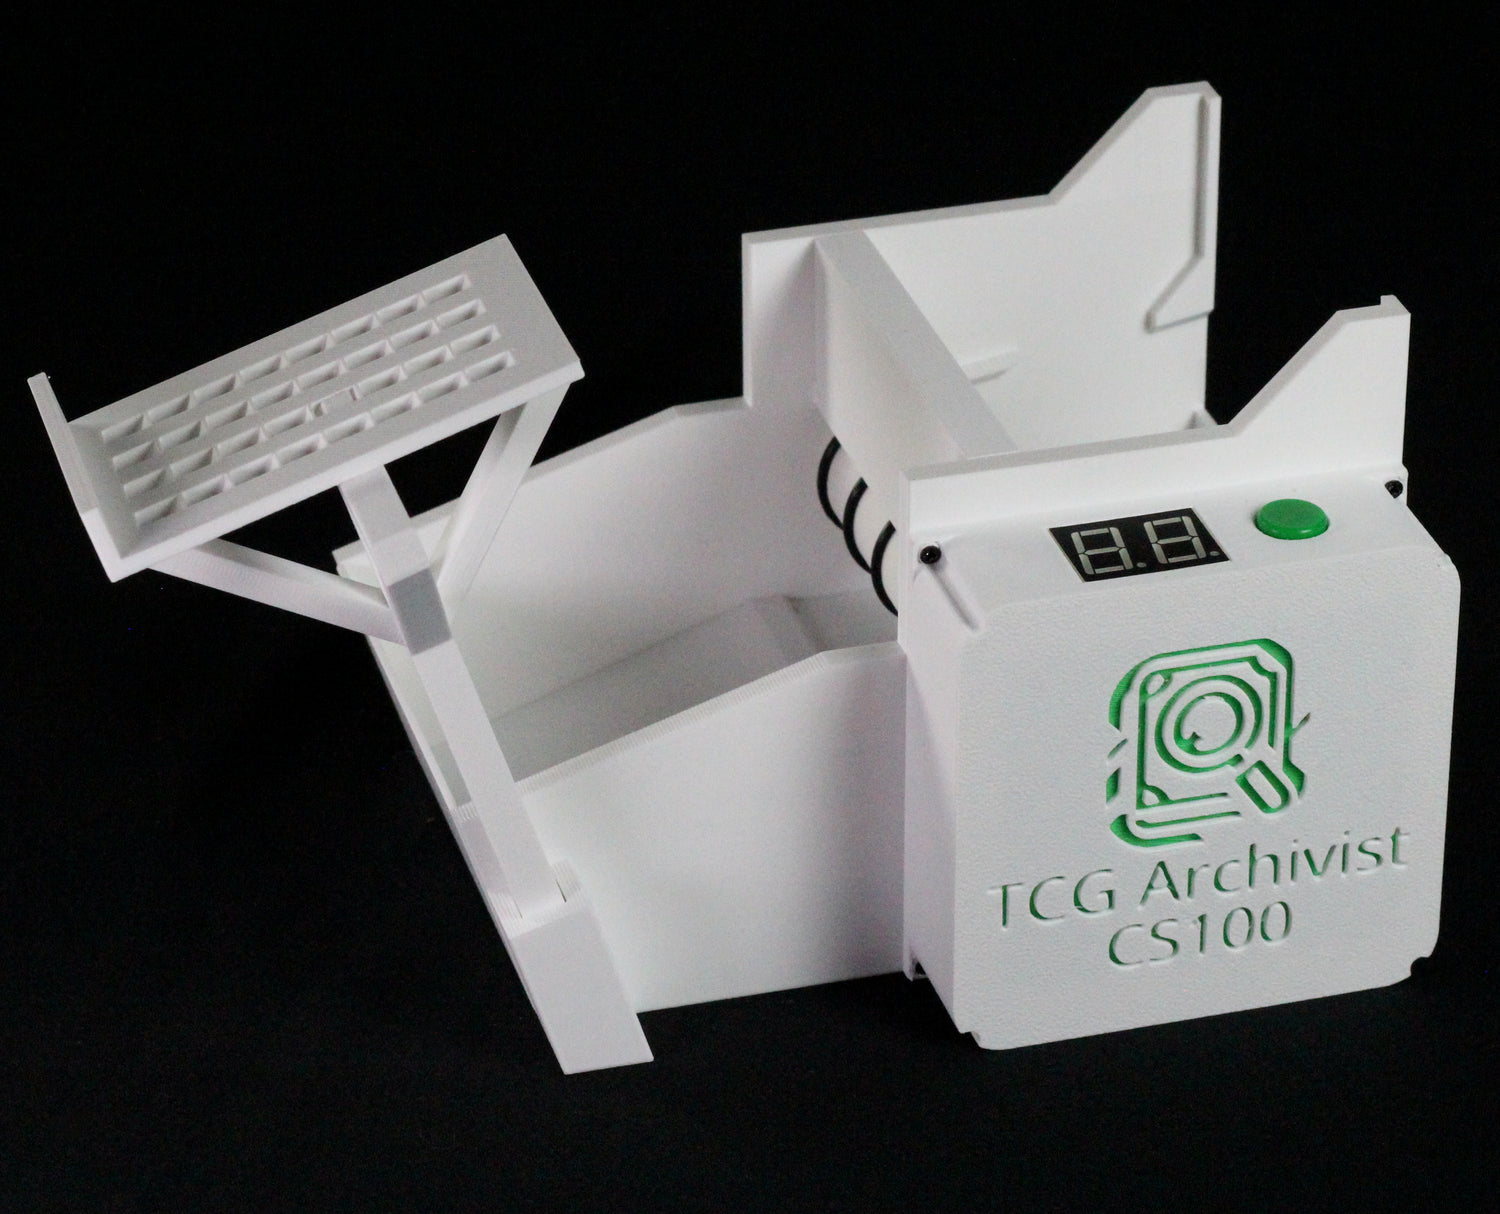
The CS100 will come mostly pre-assembled. Out of the box it should look similar to the image shown.
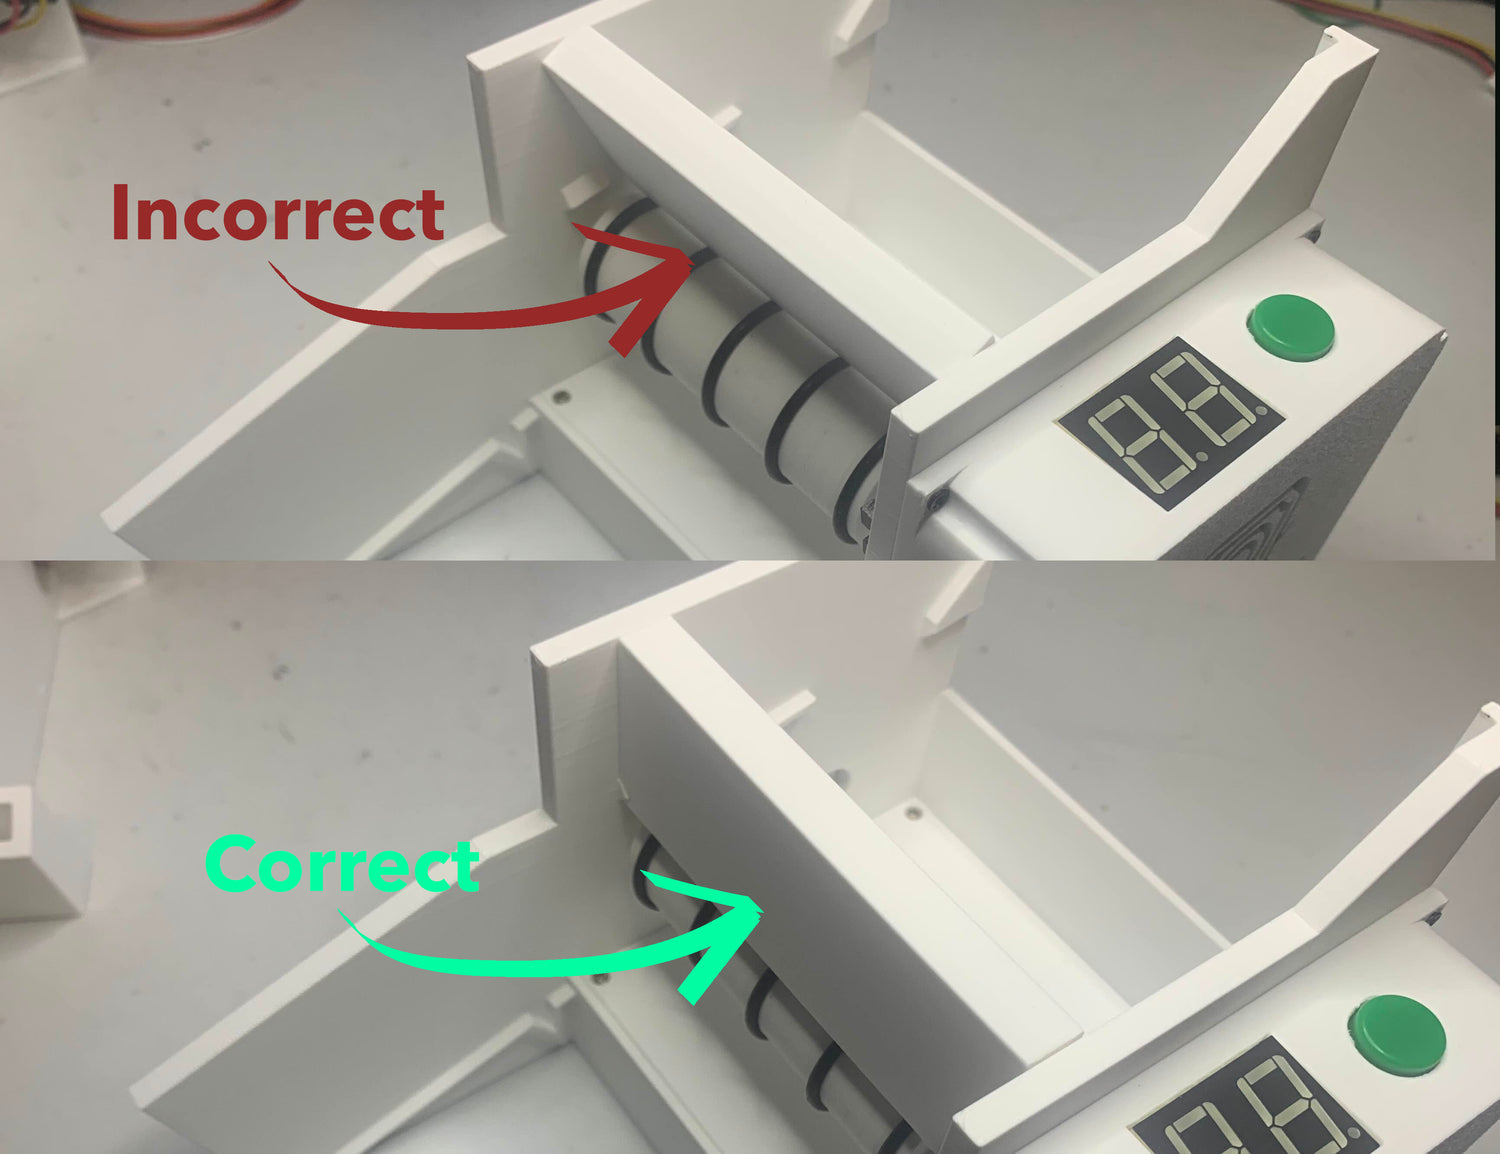
Ensure the Card Blocker is Installed Vertically
The card blocker is the white rectangular piece that acts as a cross beam from each side of the machine. Occasionally the card blocker can be dislodged during shipping or unboxing. Make sure this card blocker is vertical before moving on. If the card blocker is installed correctly it will be locked into place and not allow rotation by hand.
If the blocker is dislodged you will need to reseat it. To do so slightly pull one side of the device away from the card blocker and then once the card blocker is free from its pegs remove the card blocker. Then reinstall the card blocker in the vertical position. Ensure to align the card blocker properly with the pegs and rails to ensure it slides into place.
You can find a video of this being done here.
Assembly of the CS100
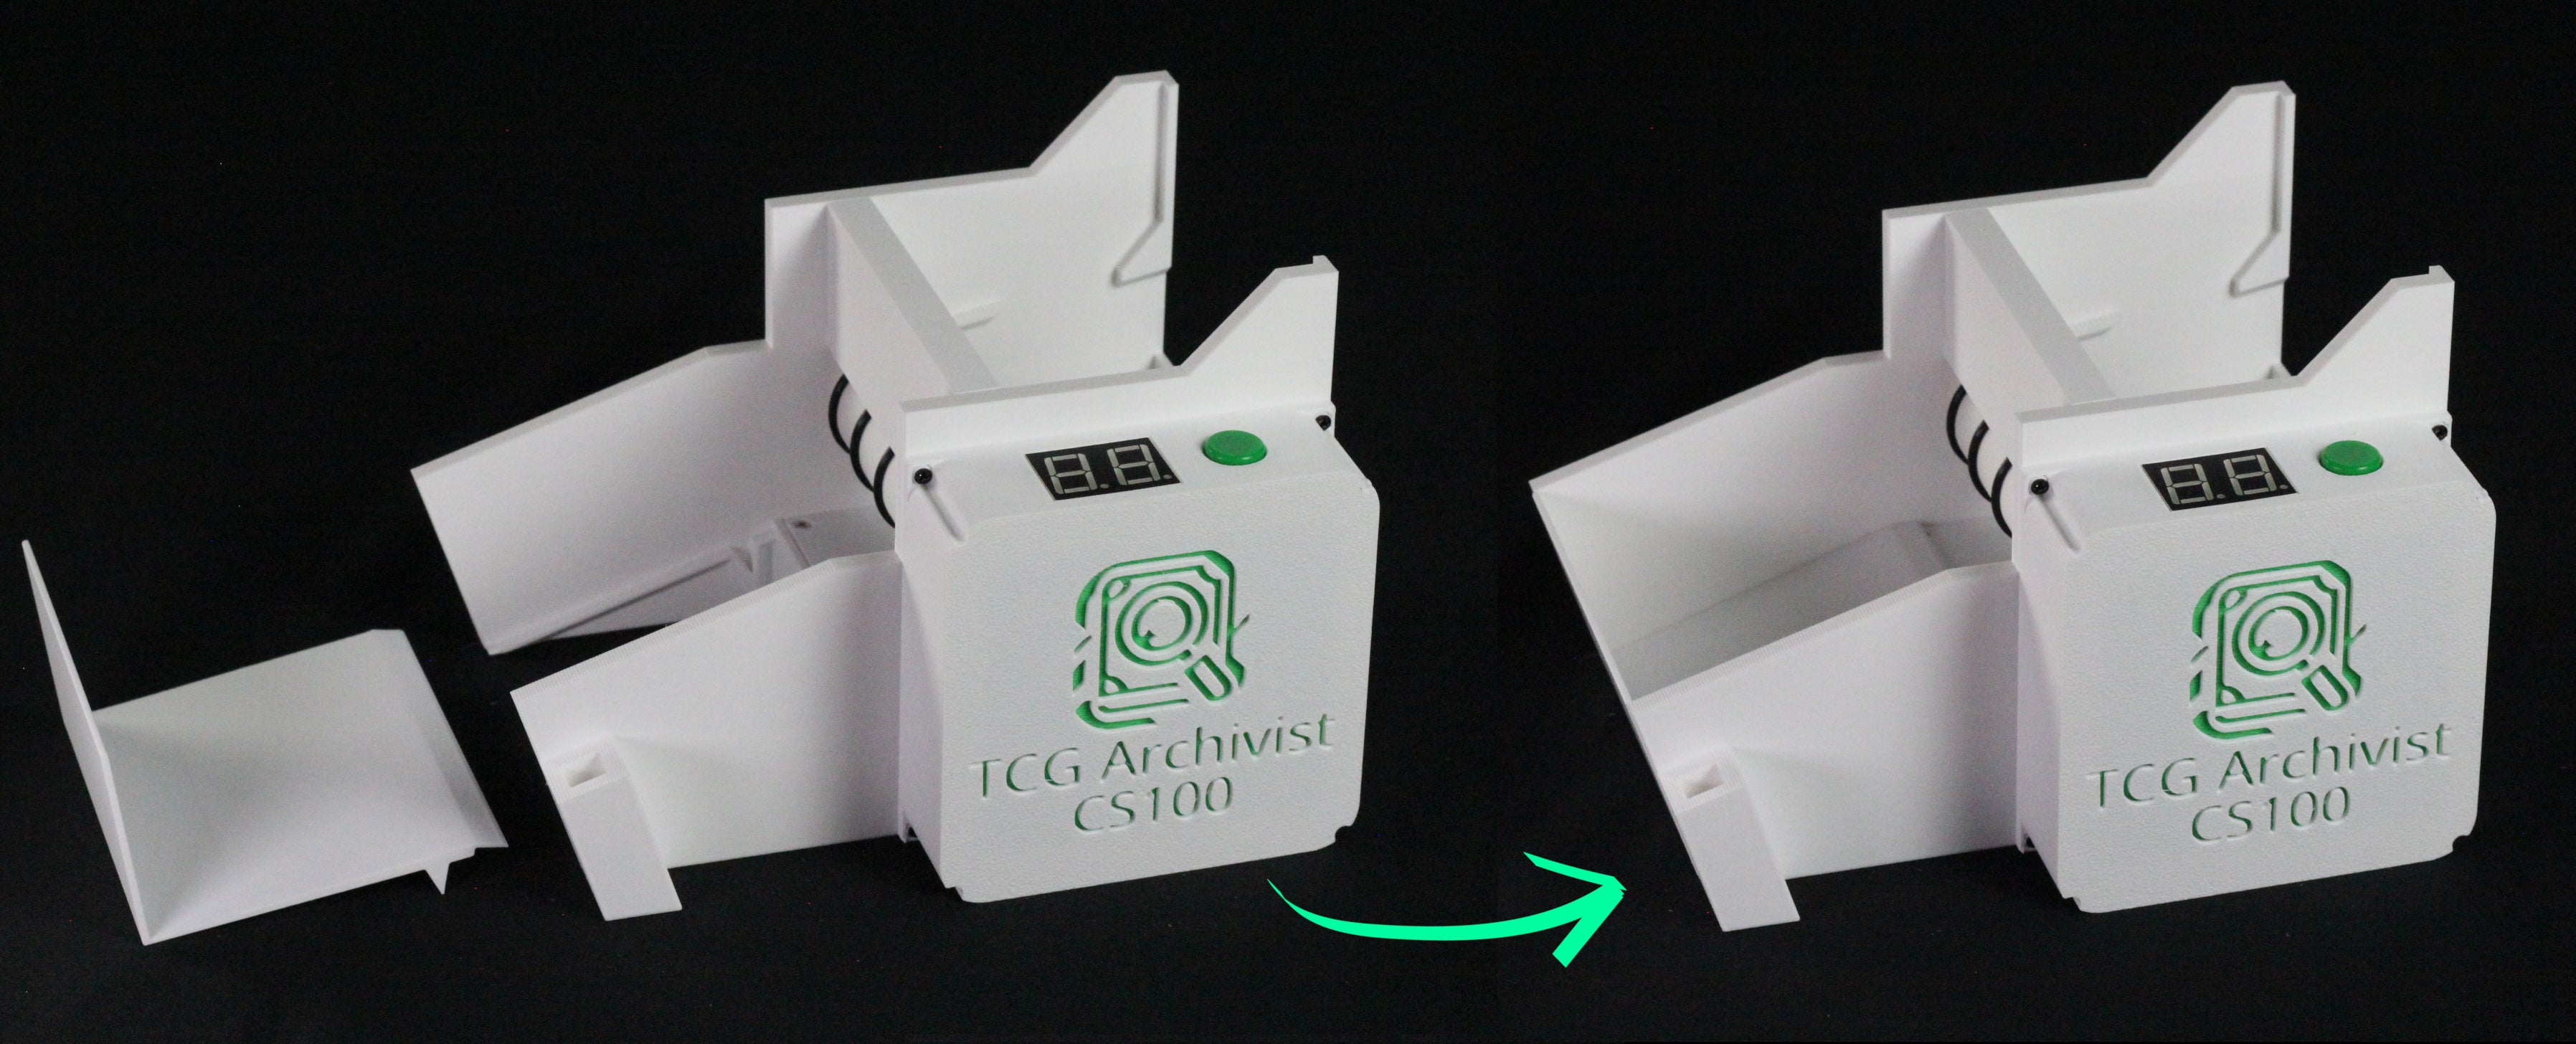
Install the Exit Bin
The exit bin collects the cards to be scanned. It is simply placed on the tracks of the CS100 as shown below. When installed properly the traingular fangs on the bottom of the bin will sit into the depressions on the tracks of the CS100.
Assemble the Phone Stand
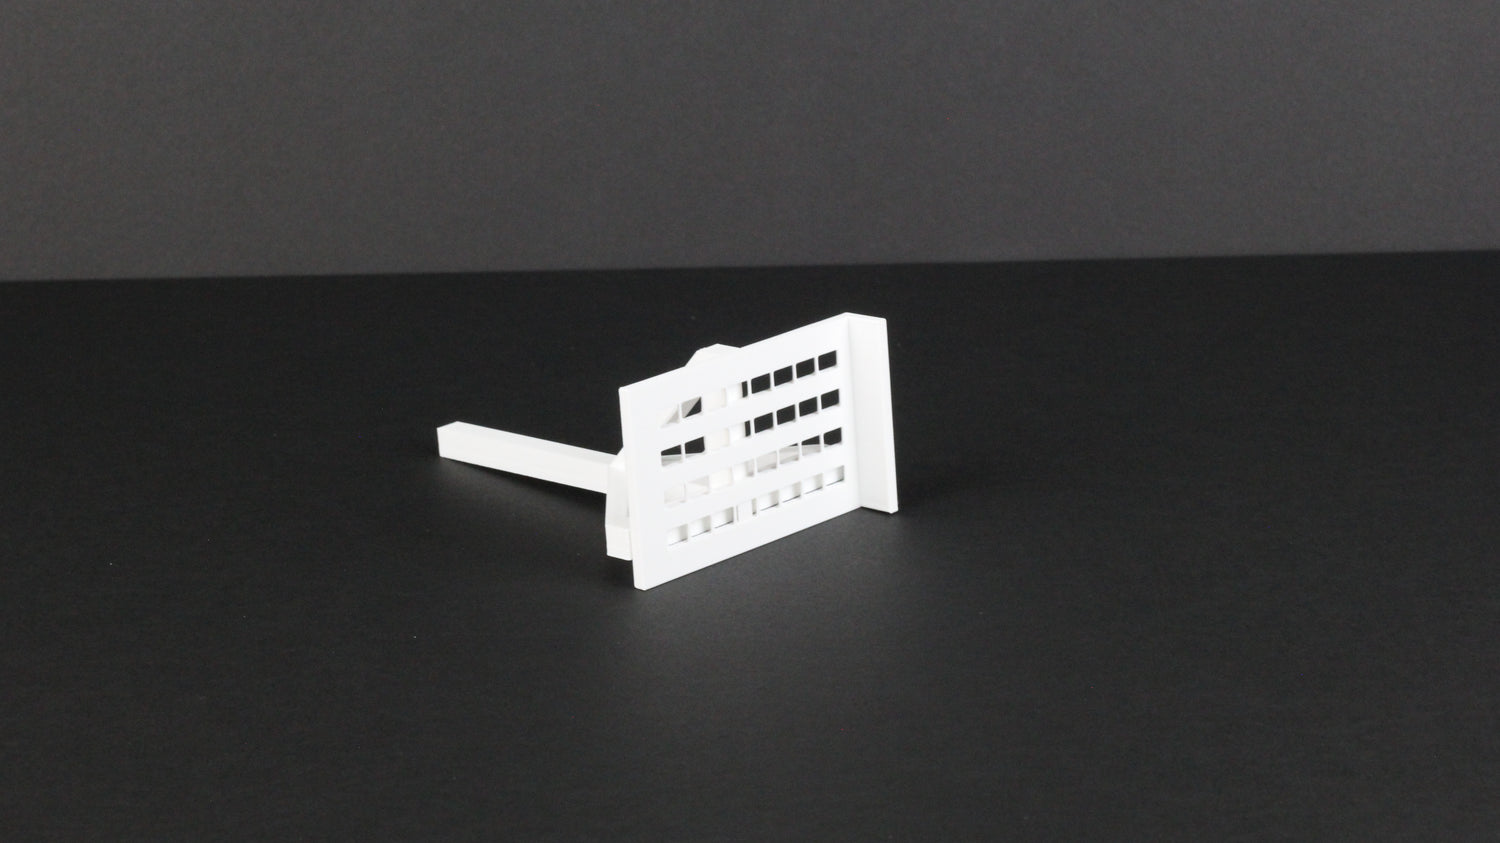
The phone holder is built with a grid pattern. On the top end of the phone stand is a small notch. Place the notch of the phone stand into any of the grid holes in the phone holder then slide the stand forward to lock the two pieces tightly together. If needed later you can relocate the notch into different grid holes to adjust the position of the phone stand relative to the CS100 to account for your phone's camera position. This might take a little bit of trial and error to find the correct position for you. We will touch on this again later, so just ensure you understand how the phone stand connects to the phone holder grid in this step.
Attach the Phone Stand to the CS100
In the next step we insert the assembled phone stand into the CS100 unit. The phone stand should simply slide into the square hole in the base of the CS100. The CS100 is now fully assembled and ready to use.
Note: The phone stand is designed to be stored in the card exit bin when not in use, this will make the CS100 much smaller when storing.
Using the CS100
Power the Device
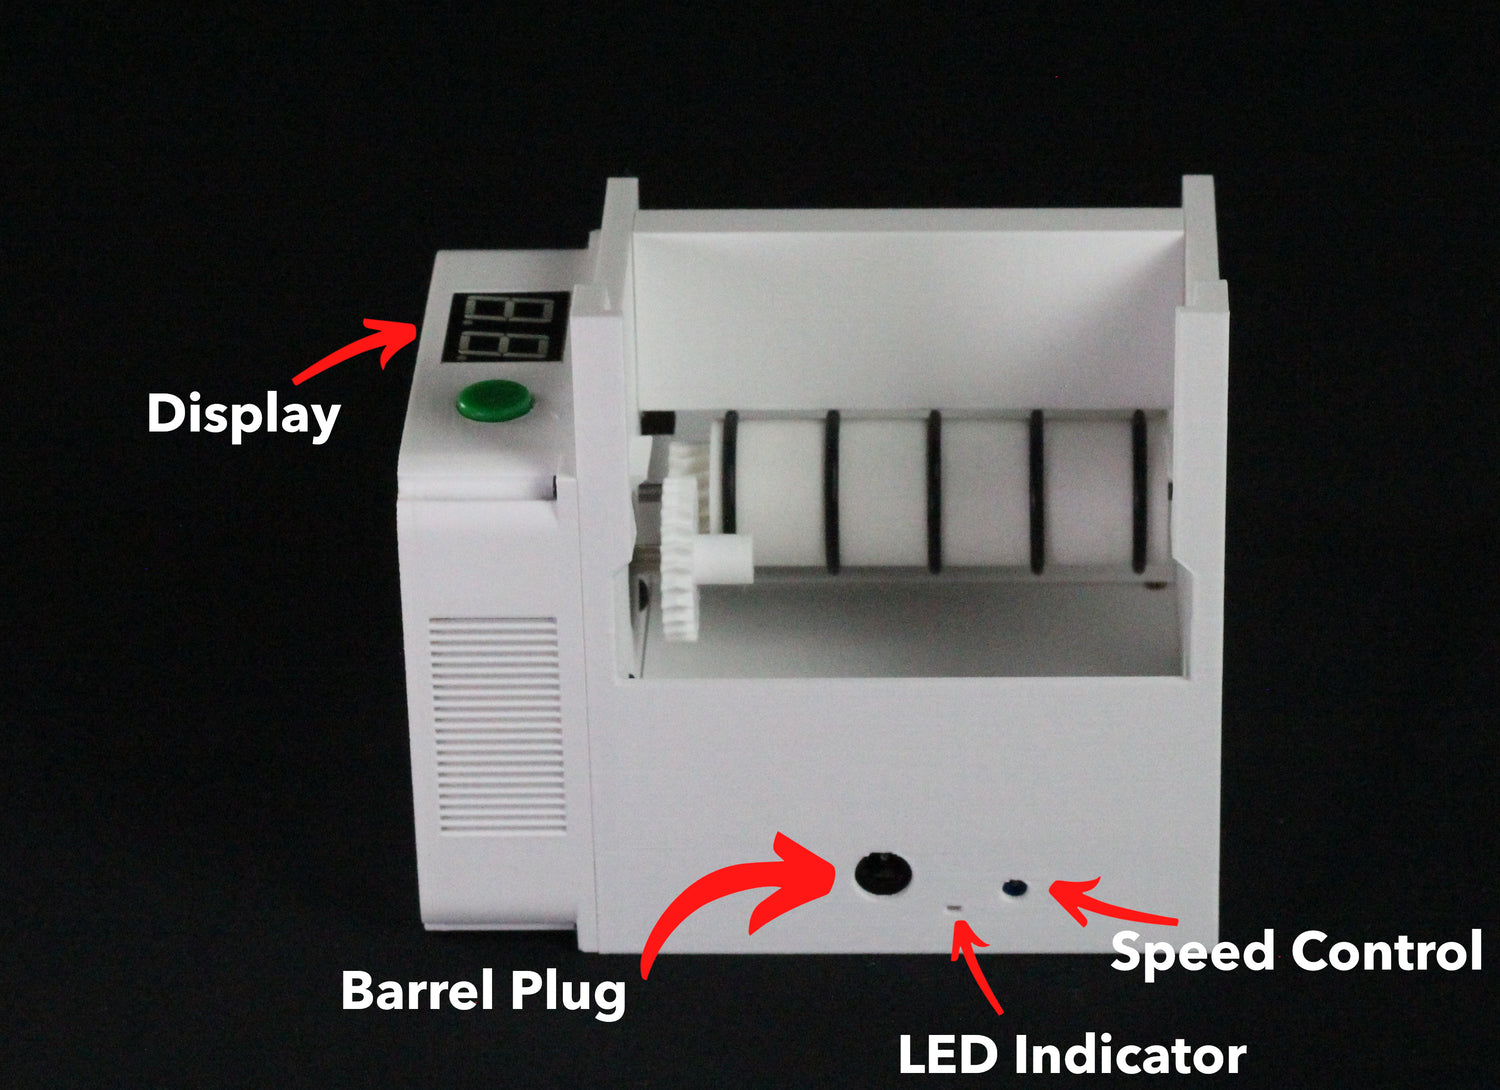
To power the device plug the power supply that is included in the accessory kit into the wall. Then plug the barrel jack into the rear of the device. The device should enter standby mode. Standby mode is indicated by the flashing LED indicator on the back of the device and a number between 0-98 being shown on the display.
Adjusting the Speed
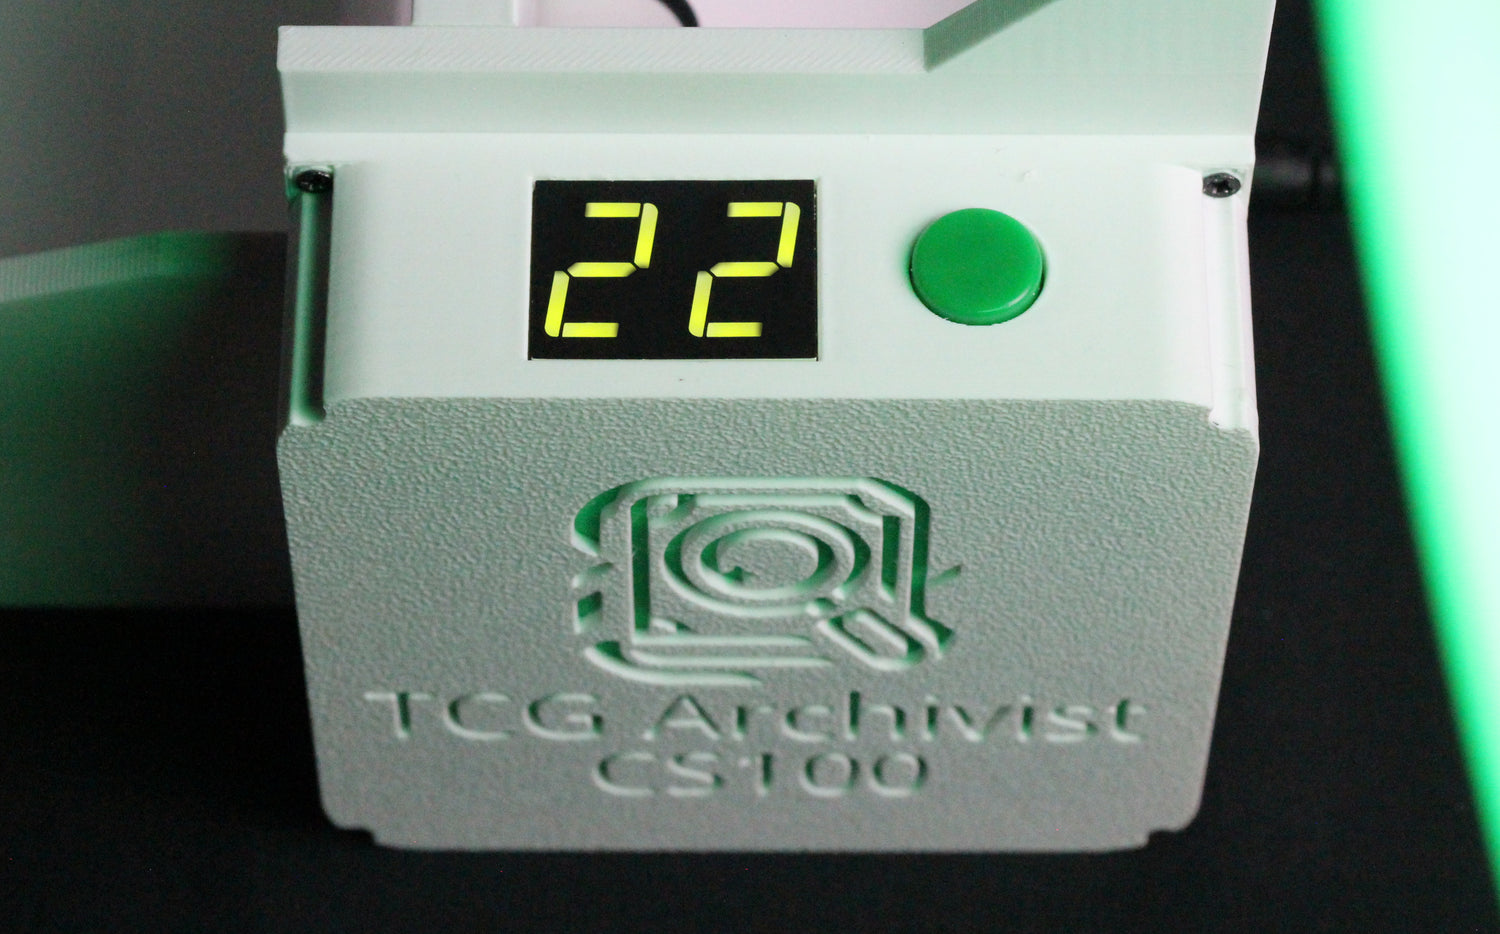
When the CS100 Gen 2 is first powered on and in standby mode, the display will show a value between 0 and 98. This value corresponds to the current speed setting of the device. To adjust the speed, insert the mini screwdriver into the speed control hole on the back of the device and turn the screw. Turning the screw clockwise will slow the speed, and counter-clockwise will speed up the machine. The readout will change in realtime to show the new adjusted speed.
Tip: We recommend starting at a speed setting of about 25. You can adjust the speed while the device is running, you will just not be able to see the speed readout while the CS100 is running. The speed setting will be "remembered" through power cycles.
Note: The speed setting is only displayed before the start/stop button is pressed. Once the start/stop button has been pressed the display will show the current card count. In order to once again display the speed setting you will need to power cycle the device.
Testing the Device
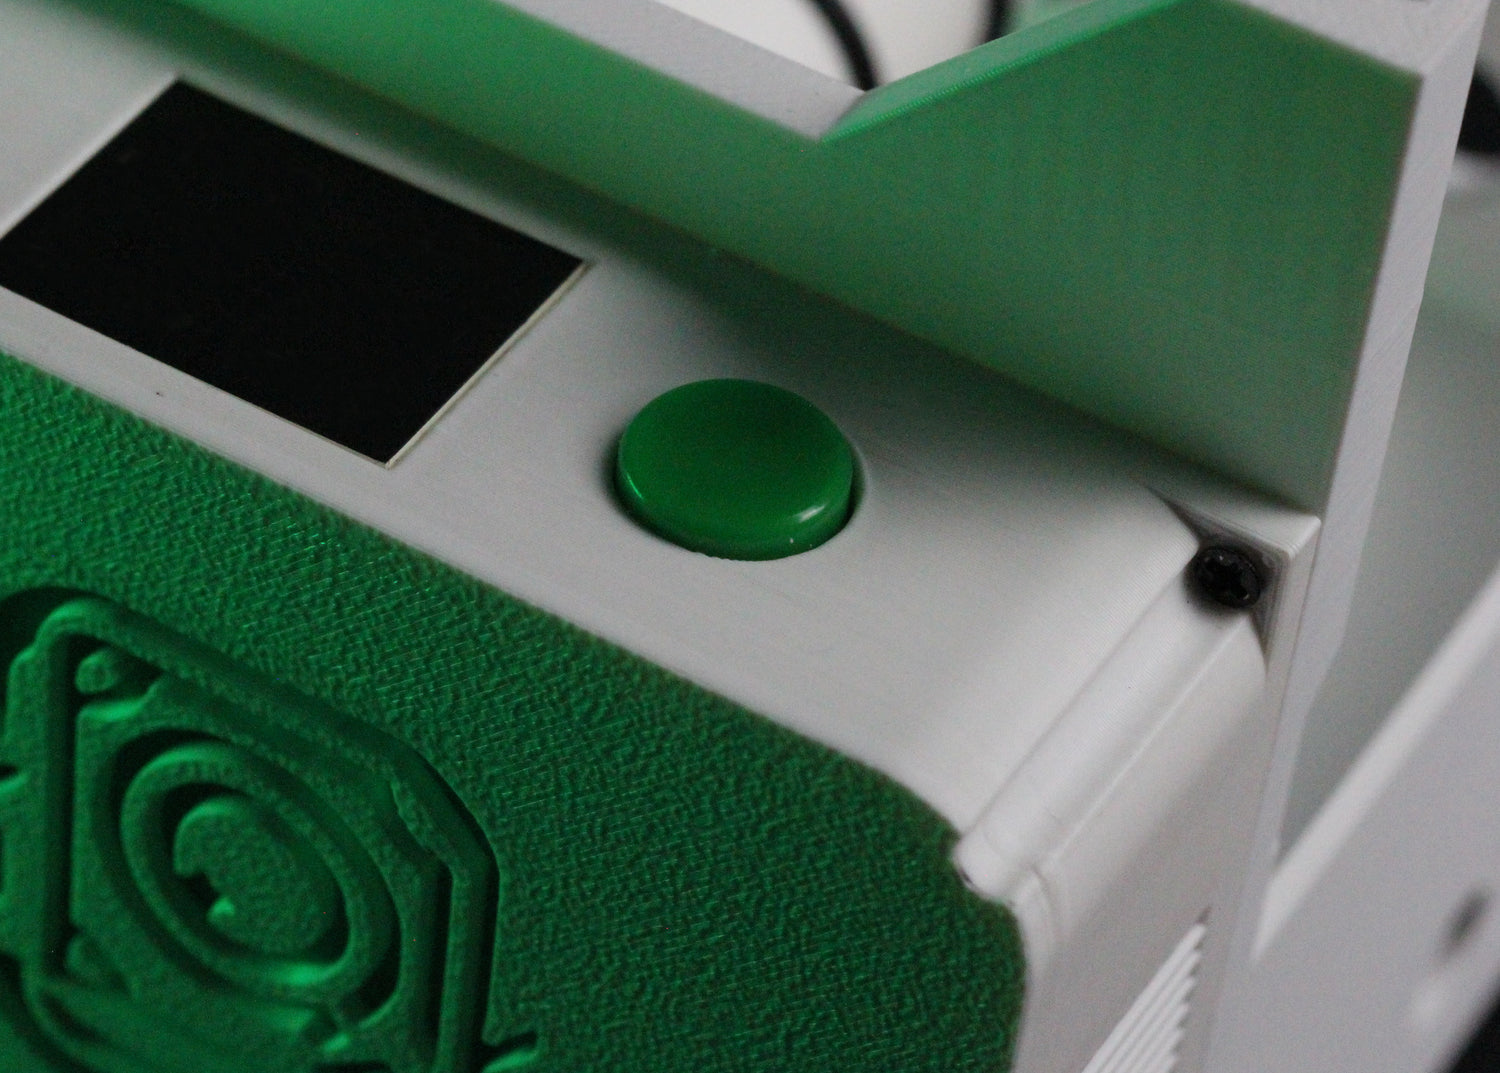
Once you have the machine powered on and have set the speed to the desired setting we recommend you test the device before inserting any cards. Press the start/stop button located next to the display. The display should turn to show "00" and the roller should spin for a few seconds before stopping. The readout of "00" here is the card count readout. In later steps we will see this card count in action.
Note: You can press this green button at any time the device is running to stop the device.
Place Your Phone
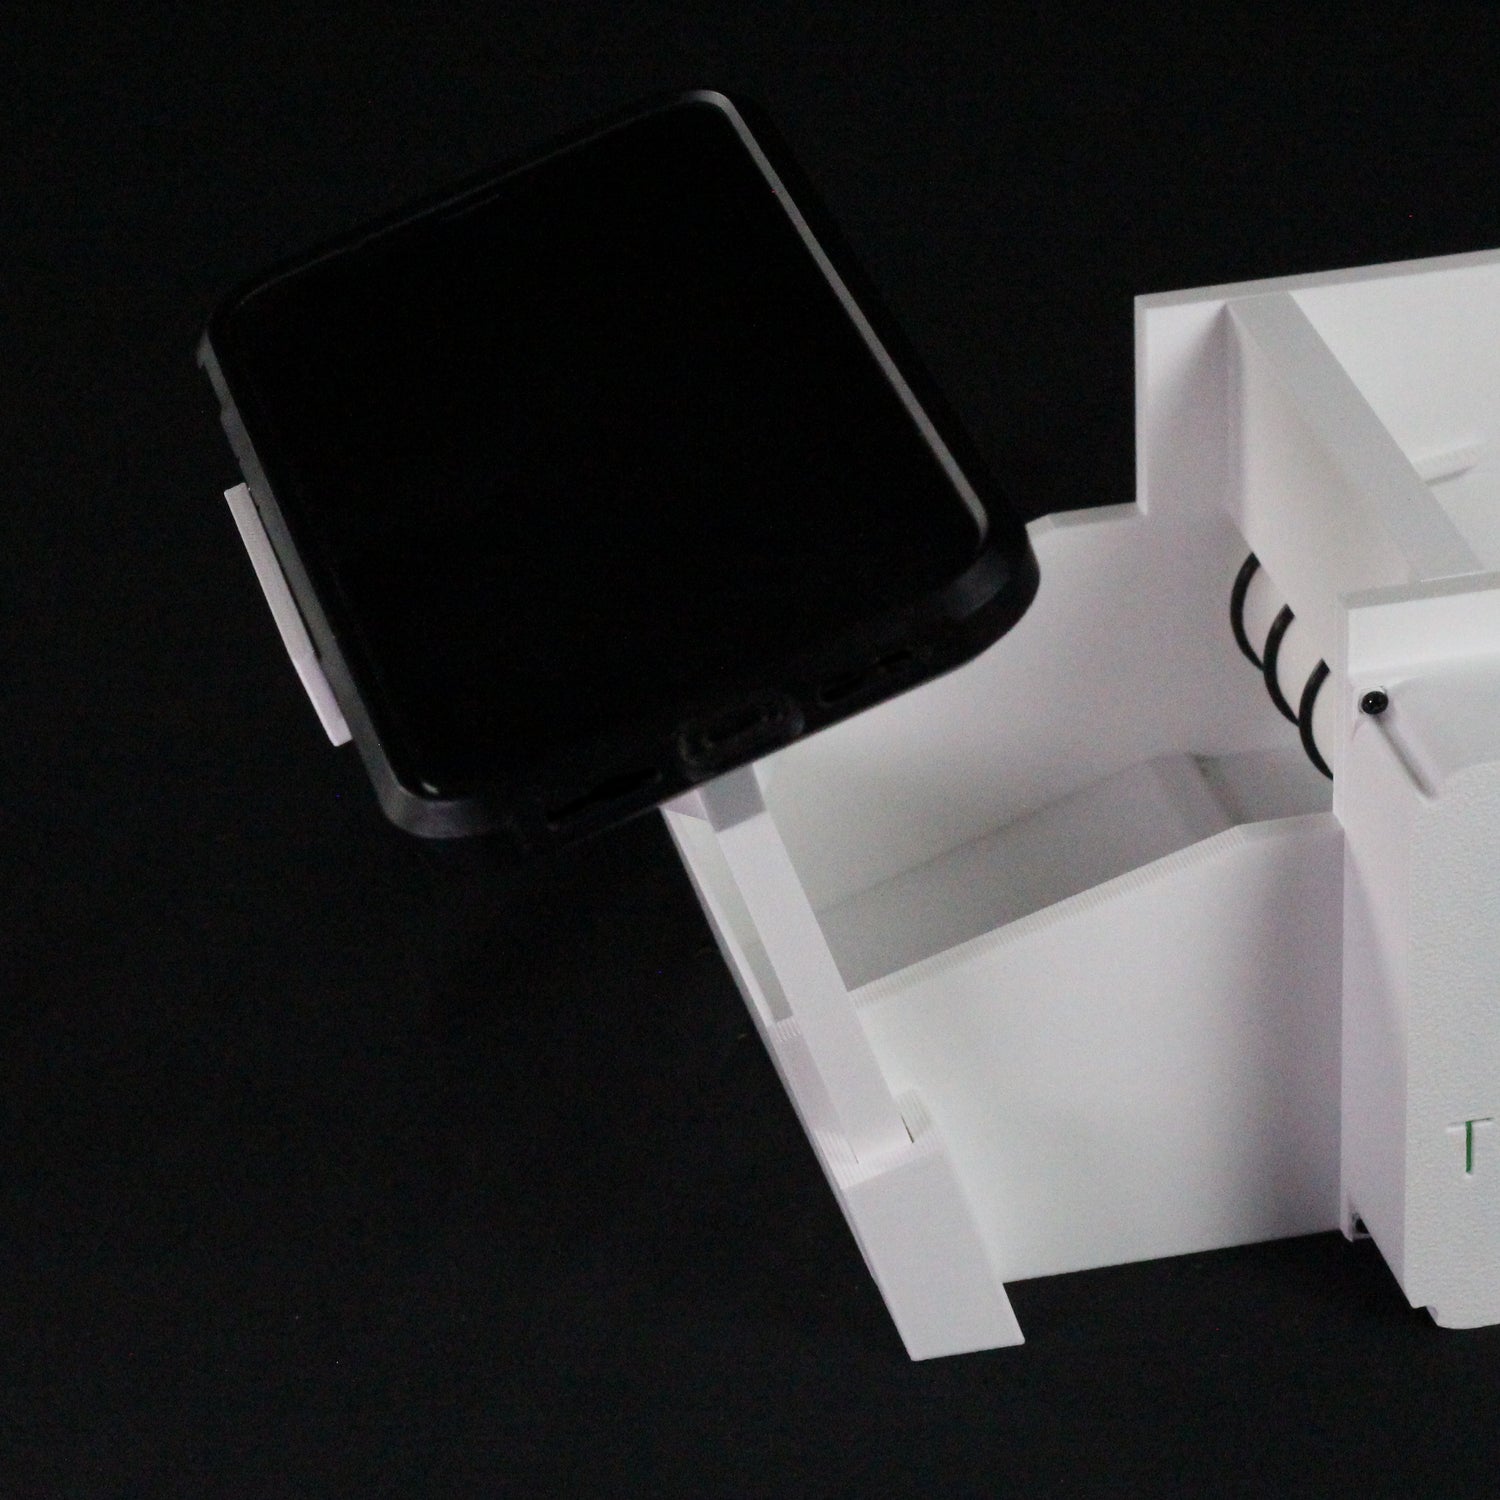
Place your phone such that the exit bin is centered on the screen. Depending on what app you chose to use and the type of phone you have to may need to reposition your phone. You can reposition your phone by removing the grid from the phone stand and repositioning the grid. Or if you need to move your phone up, you can add the phone stand extenders shown in the next step.
Note: sure what app to use? We recommend ManaBox or Delver Lens (Android) / Delver X (iOS). Join our discord for our recommended settings.
Tip: CS100 User's report the best results when setting the apps to scan a specific set.
Phone Stand Extenders
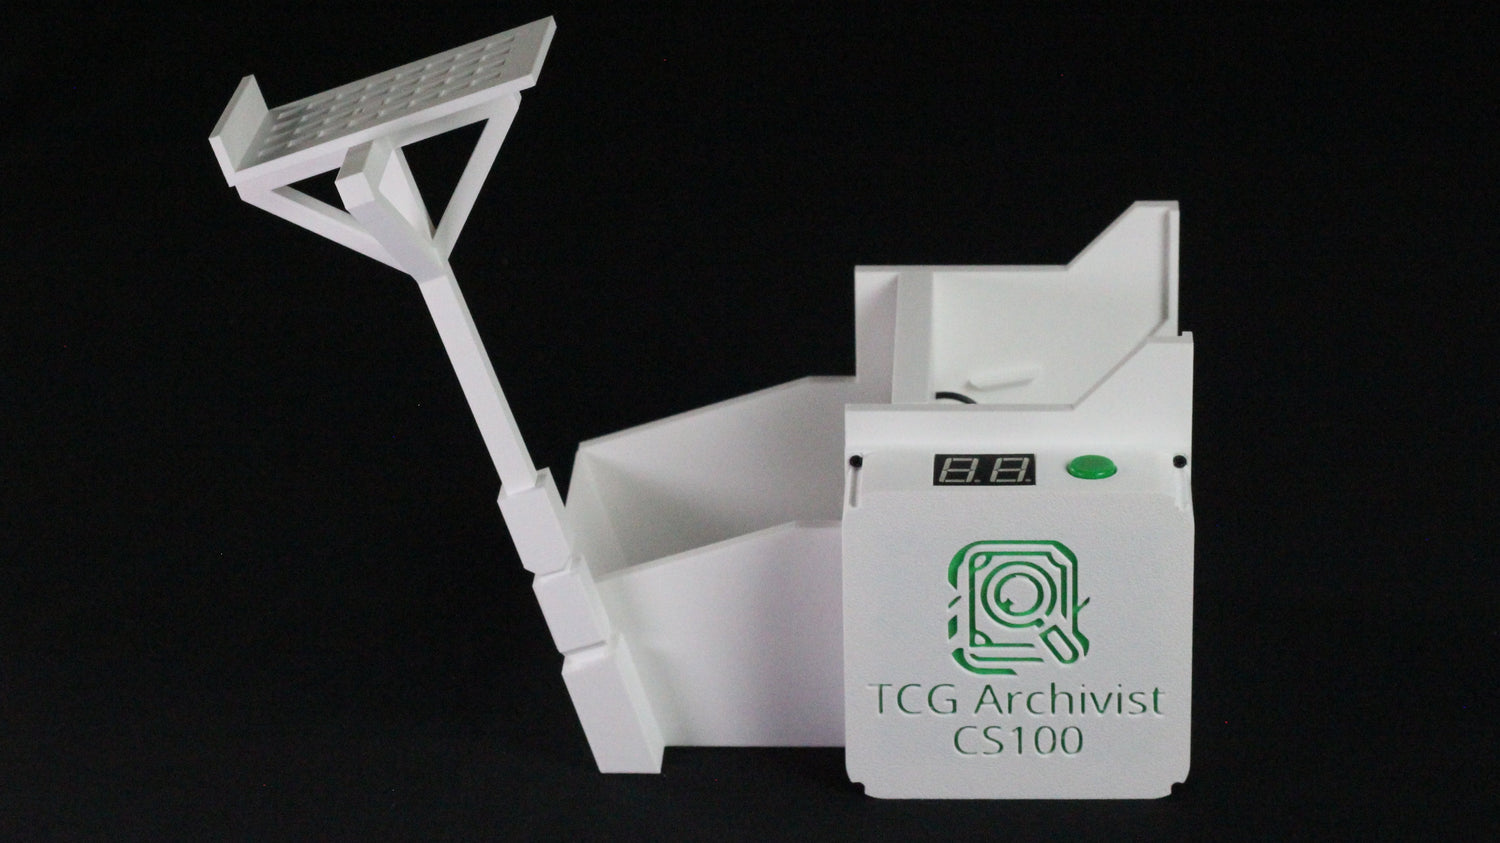
Different phones have different cameras with different focal lengths. To ensure that the CS100 works with all different phones we have added phone stand extenders to allow the user to customize the distance from the phone to the CS100. You can use a phone stand extender, or the combination of both to customize the phone's distance from the CS100. Play around with this position and determine what works best for you.
Lighting
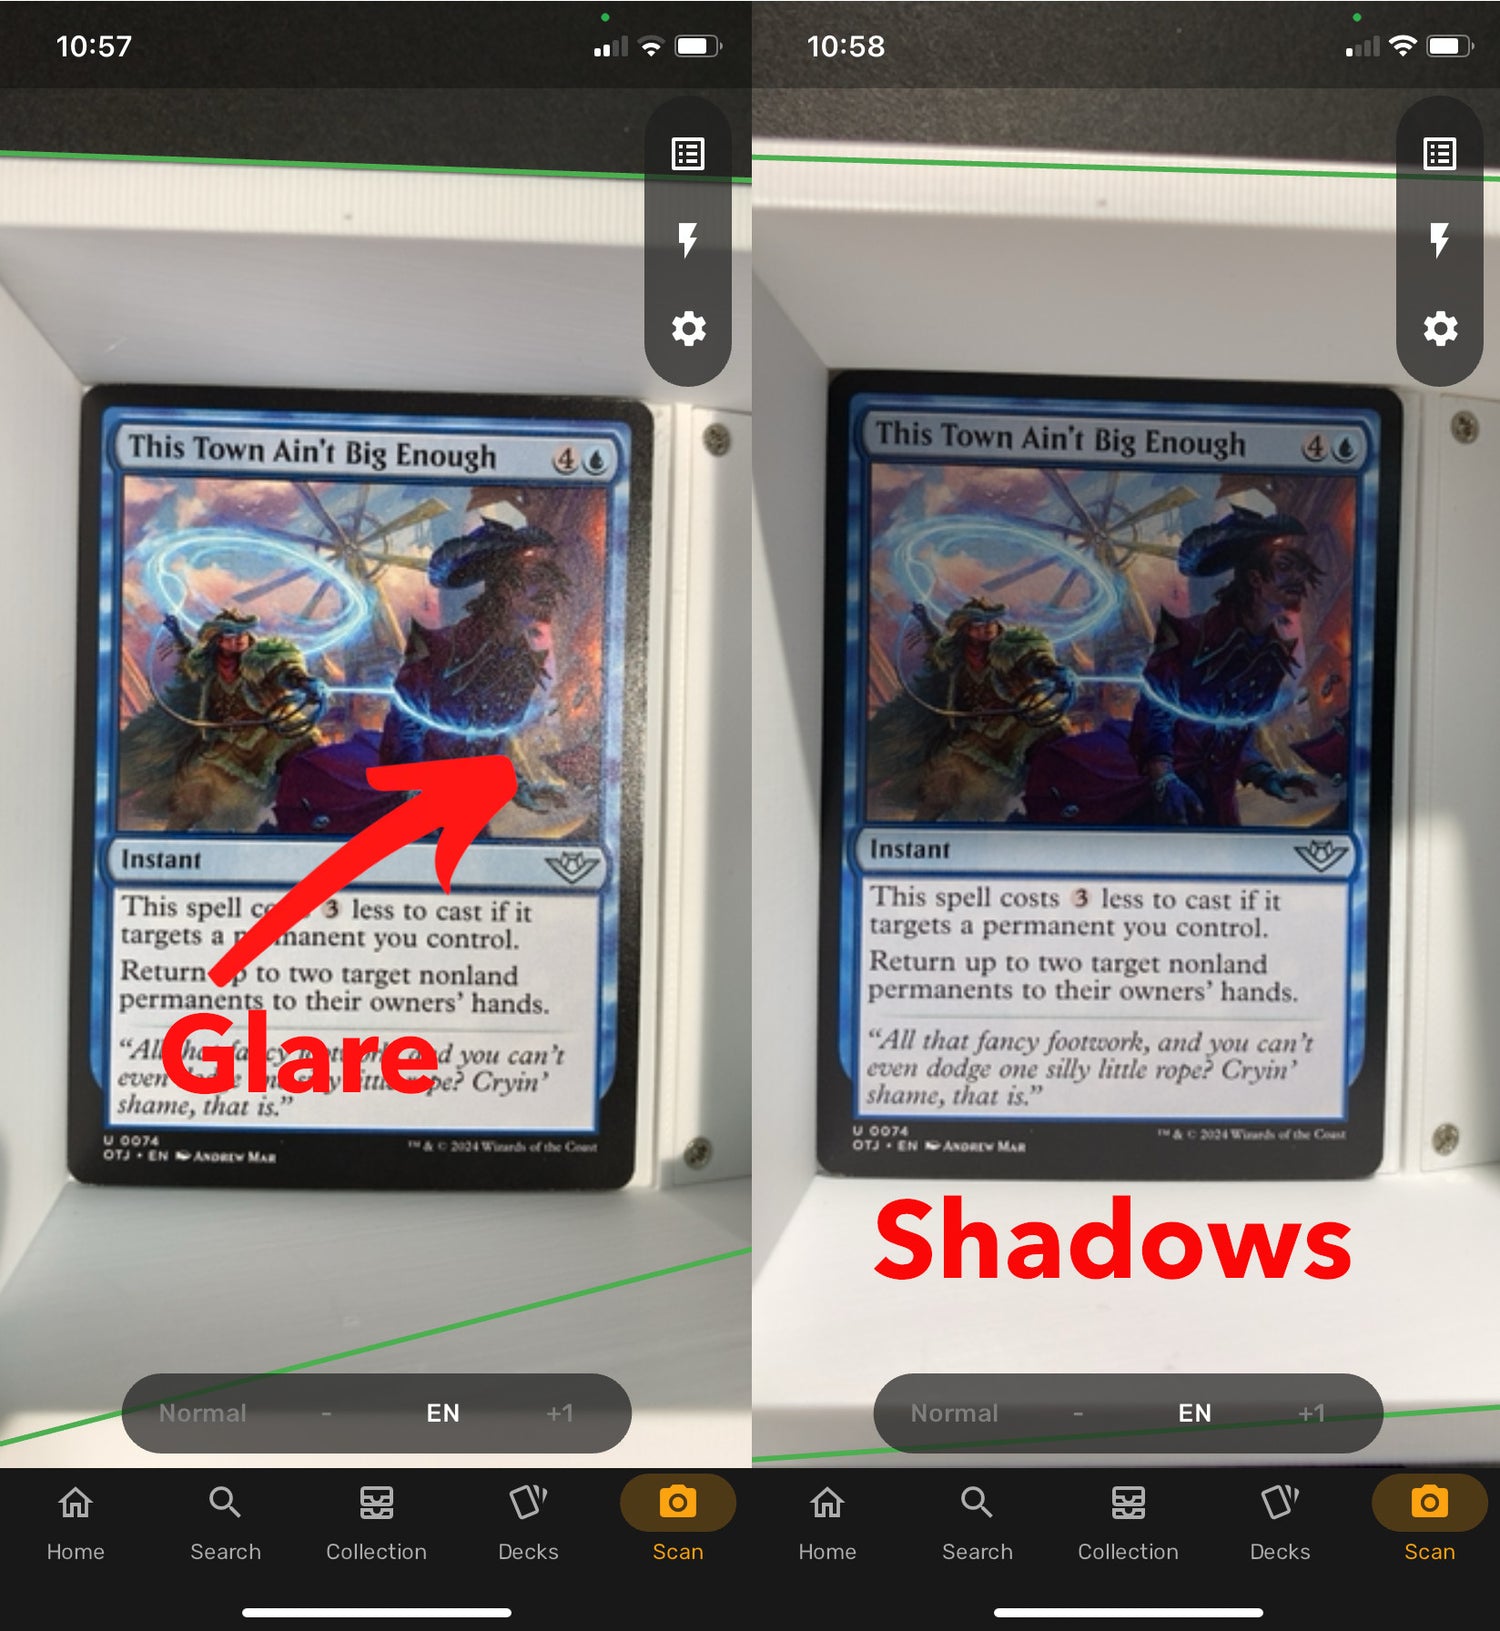
It is critical for the scanning applications that the lighting in the exit bin is not too harsh. You want to minimize both glare and shadow. This is often best done by scanning in a room with no or minimal artificial lighting. We find that natural or soft lighting works best. Position the device relative to lighting in such a way that there are minimal shadows in the exit bin. This can often be accomplished by simply rotating the entire device. Some experimentation will be required to find what works best for you. Once you nail the proper setup, you should expect 98%+ reliability when scanning.
Lighting is a very important element to the scanning process, if you are having issues please join the discord for tips from other users!
Tip: Some users report better performance placing the device on a uniform white surface.
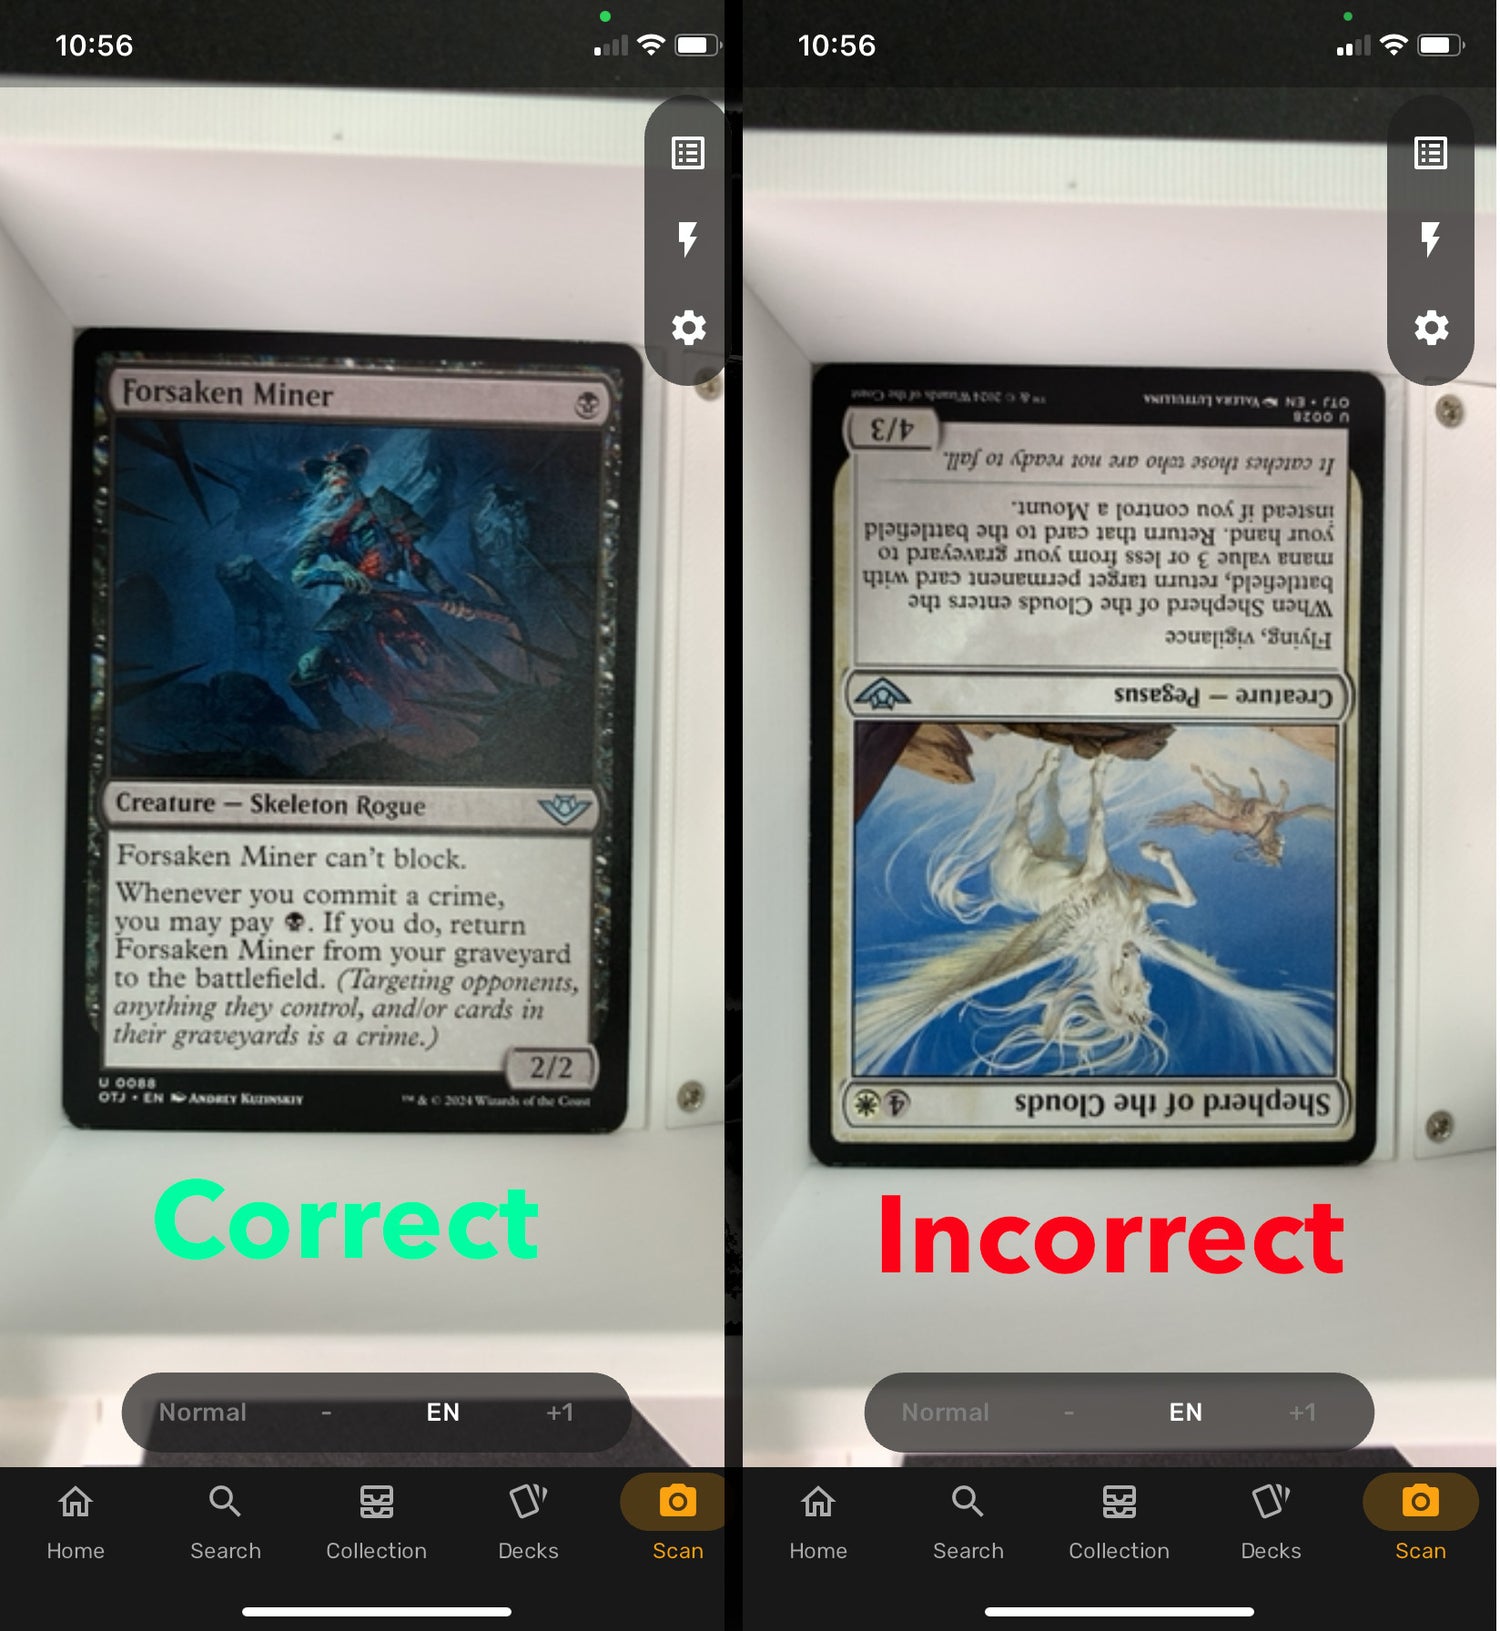
Card Orientation
The scanning apps will work much better if the cards are oriented so they are scanned with the top of the card aligned to the top of the phone. Ensure when you place cards into the card hopper you have oriented them in the correct manner.
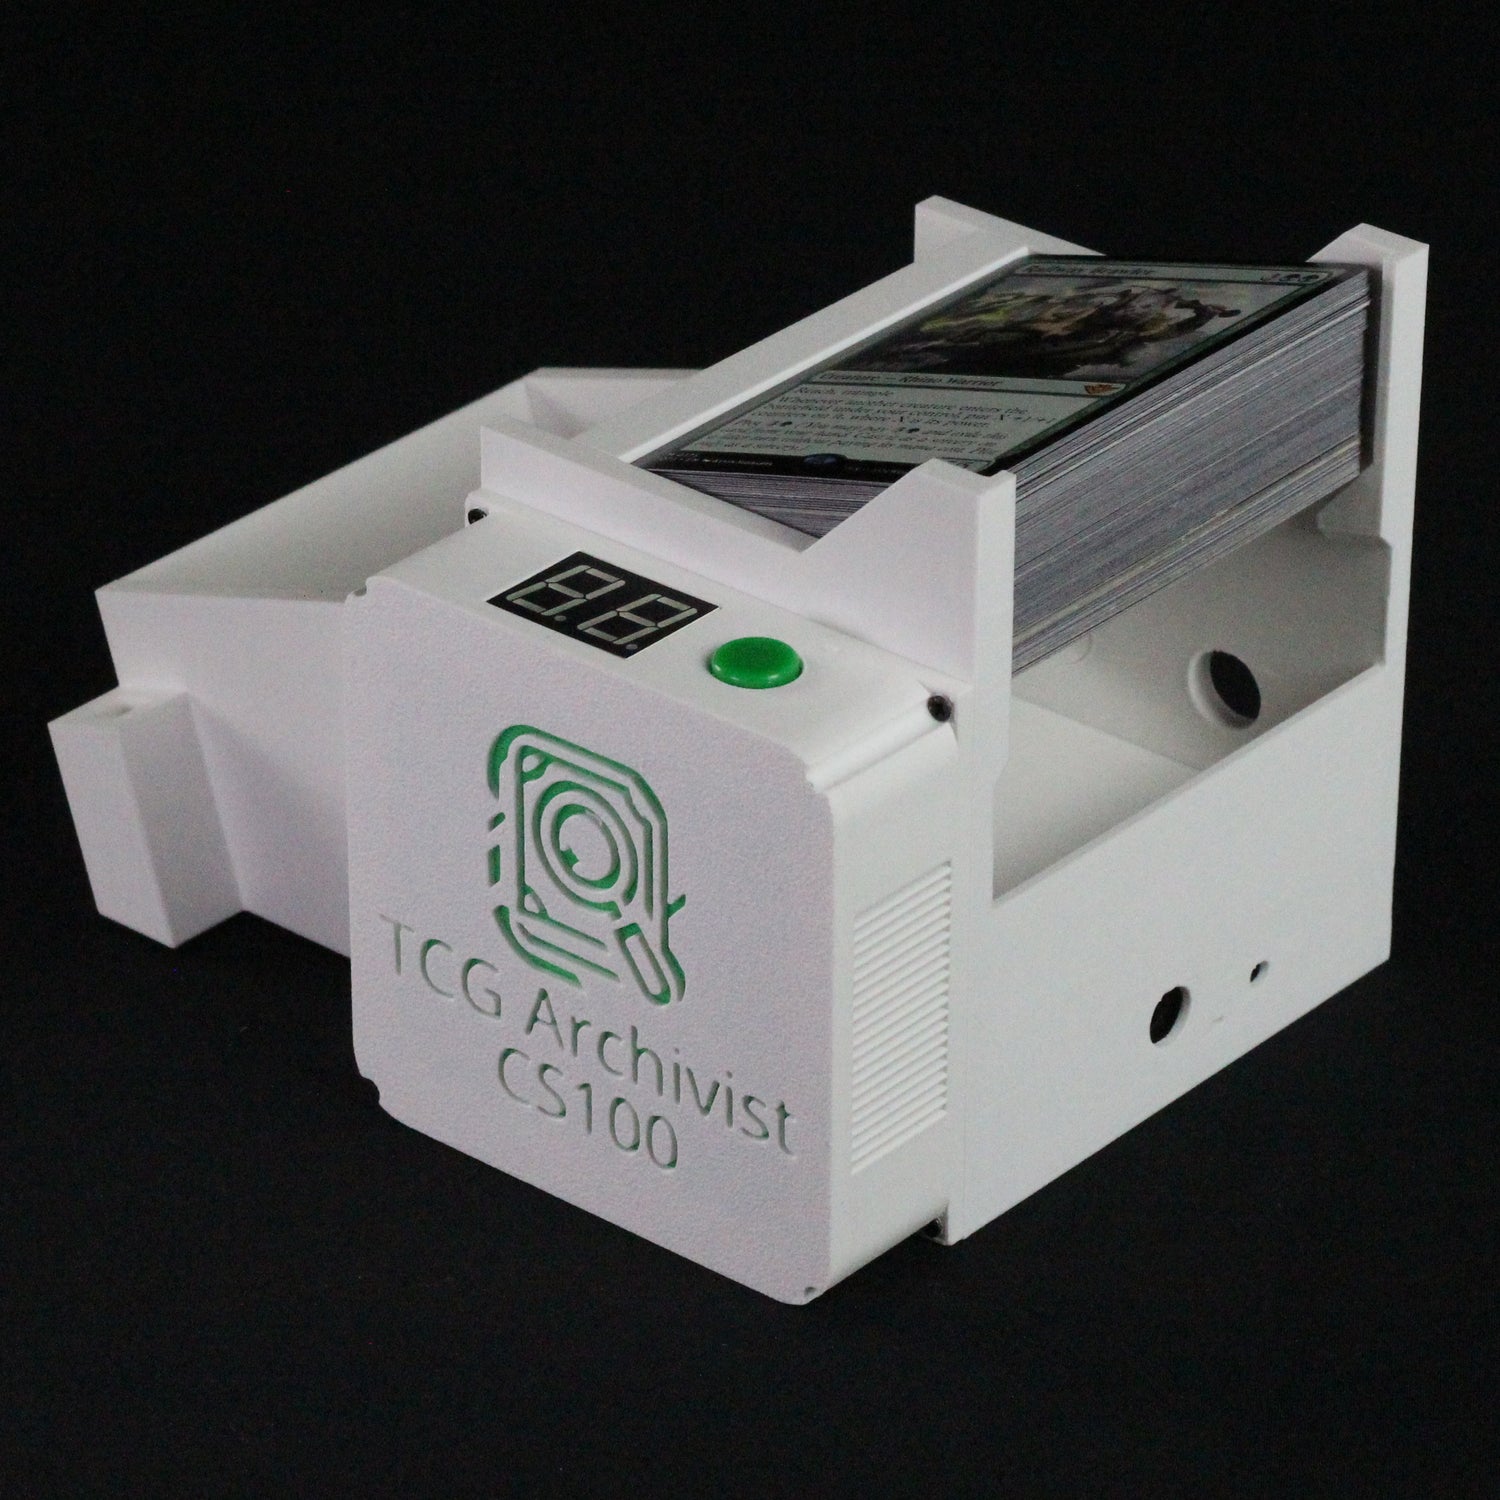
Adding Cards and Scanning
You can place up to 100 cards into the card hopper as shown. Cards that are properly placed will lean slightly forward. Once you have placed the cards into the hopper, ensure that your phone's app is running and that the position of the phone and the lighting are optimal. Then simply press the green start/stop button on the device to begin scanning.
We recommend running a few test scans to dial in your setup of phone position and lighting. Also ensure at this phase that the card counter is working as expected. Each time you start a new scan the card counter will reset to "00".
Note: If the card counter goes above 99 cards it will roll over to 00 and illuminate the bottom right decimal point to indicate this roll over. In other words 01 with the decimal illuminated corresponds to 101 cards scanned. The device will halt scanning at 199 cards scanned.
Tip: If you notice the first card coming out of the machine is often missed, try manually putting a card into the exit bin just before starting the CS100. This will allow the camera time to focus in the correct spot before the mechanism begins.
Questions? Join us on Discord.
We have an active community of members and developers that want to ensure you get the best possible performance. Please join if you have any further questions or concerns. Use the /verify command on Discord to register your Discord account as an owner.
Or check the FAQ.
